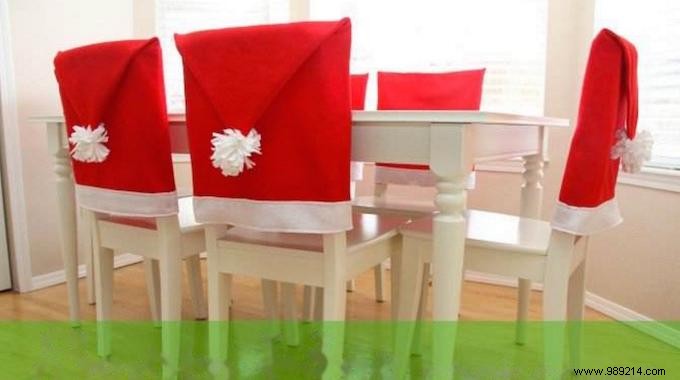
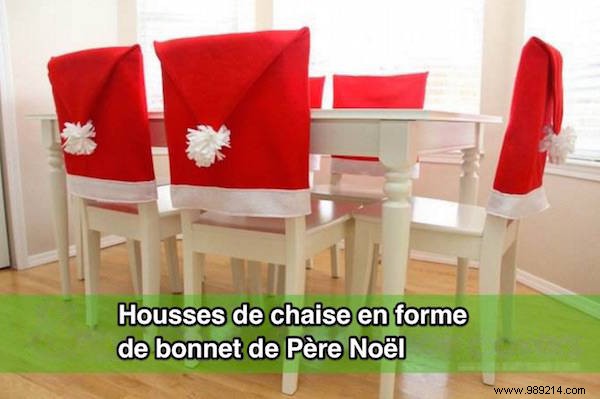
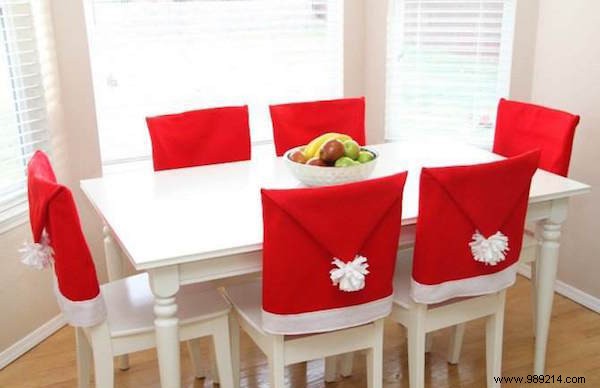
How about dressing up your dining room with beanies? Santa Claus ?
It's a cool and festive idea for Christmas, isn't it?
What do you say? So here's how to make your own Santa hat chair covers.
Don't worry, you don't need to be a sewing pro because you won't need to hem.
It's a quick and fairly easy little decoration to make. Watch:
- red fabric (the amount needed depends on the size of your chair back).
- white fabric (the amount needed depends on the size of your chair back).
- an iron.
- a sewing machine.
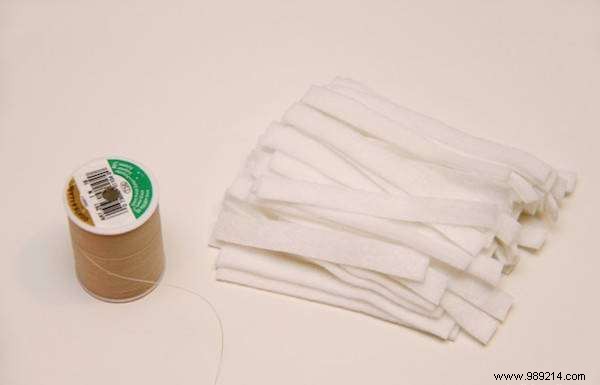
- 35 to 40 strips of white felt.
- wool yarn.
- a glue gun.
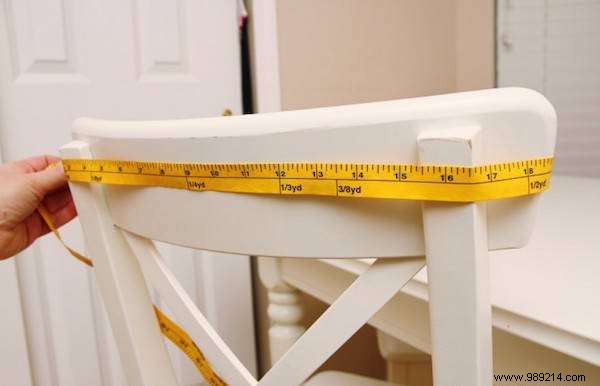
1. The first step is to measure your chair back. You need to know its maximum width as well as the height of the backrest. The chairs in the photo are approximately 50 cm wide and 45 cm high.
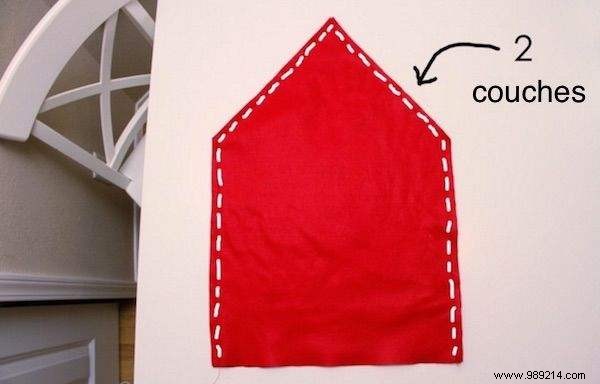
To make the shape of a Santa Claus hat, there must be a triangular shape on the upper edge.
This triangular shape should be about 25 cm depending on the size of your chair.
2. Now that you have your measurements, add 1.5 cm on each side (except for the bottom) to have enough room for the sewing point. Trace and cut out your measurements on two pieces of red fabric.
3. Place the two pieces on top of each other and sew them together all along the edges except for the bottom of the piece. Leave about 1.5 cm of margin on the edges for the sewing point.
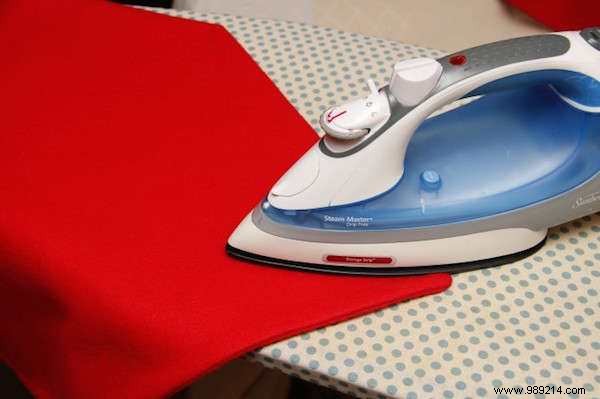
You will then need to turn the cover inside out. So if you are using a fabric with two different sides, remember to put the correct side inside.
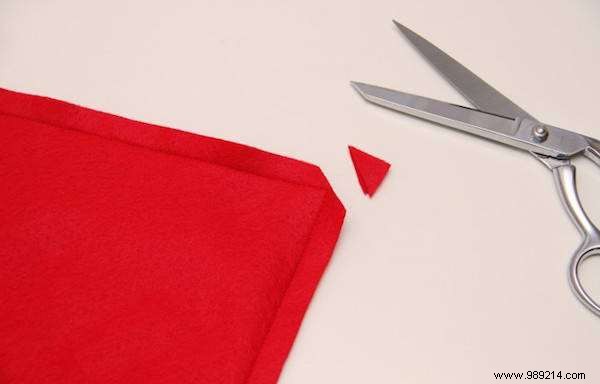
4. Cut the three angles.
5. Turn cover inside out and iron on.
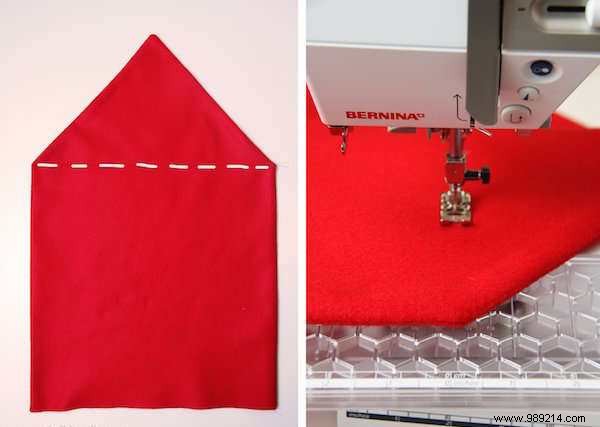
6. Sew a straight line at the top of the chair cover where the triangle shape begins. This will allow the chair cover to stay in place and not slip once installed on the chair.
7. Cut a 6.5 cm wide piece of the white fabric, taking the same length as the bottom of the chair cover. Add 1.5 cm for the stitch.
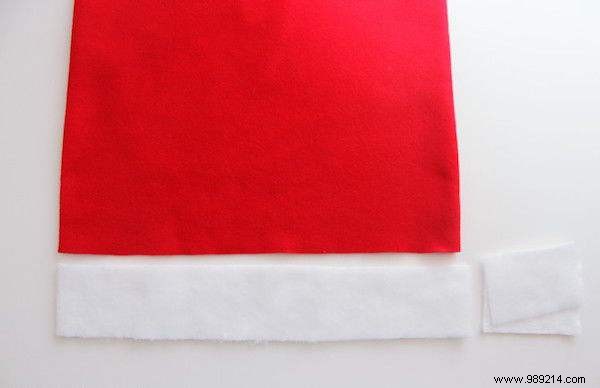
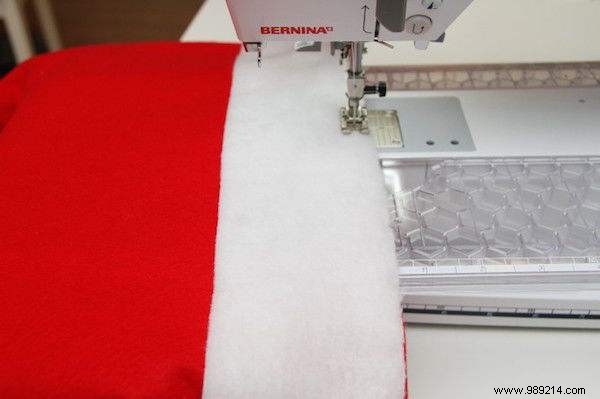
8. Sew the two ends of the piece of white fabric together. Put it on the right side and pull it over the bottom of the cover. Know that it will be more beautiful to superimpose the white and red stitches so that they don't see each other.
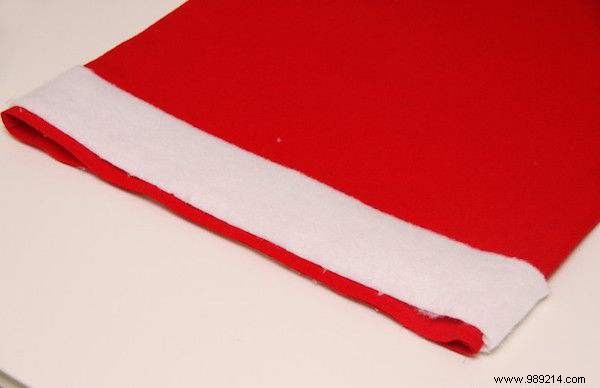
9. Sew the two layers of fabric together, leaving a margin of about 0.5 cm.
10. Cut long strips of white felt about 1cm wide. Cut these strips into 10 cm long pieces. Make about 45-50 small strips for each pom pom.
11. Wrap a piece of wool yarn in the middle of the white stripes. Pull the thread tightly and knot it several times. Trim the excess thread and ruffle the felt pieces with your fingers to form a pom pom.
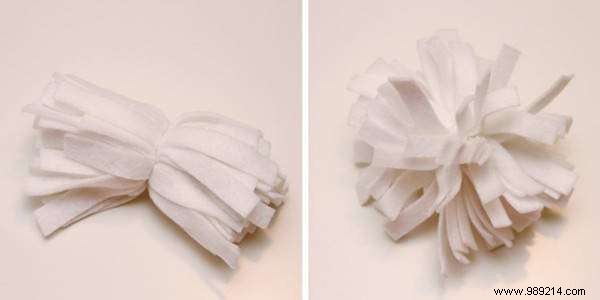
12. Use the glue gun to glue the pom pom to the tip of the seat cover triangle. Hold the pompom for a few seconds so that it holds well.
13. Repeat for each chair cover.
14. Place the slipcovers on the chairs in your dining room.
And there you have it, you have made chair covers in the shape of a Santa Claus hat :-)
You'll see your children's faces when they come for breakfast in the morning!
They will love that Santa Claus has been there :-). Beautiful memories in perspective.
And since these covers are made of polyester, they are machine washable. Very practical to clean them and keep them for the following year.
Have you tried this DIY Christmas decoration? Let us know in the comments if it worked for you. We can't wait to read you!