Family Encyclopedia >> Shopping

DIY Time-Out Stool with Built-In Hourglass: Simple Step-by-Step Guide for Parents

DIY Time-Out Stool with Built-In Hourglass: Simple Step-by-Step Guide for Parents

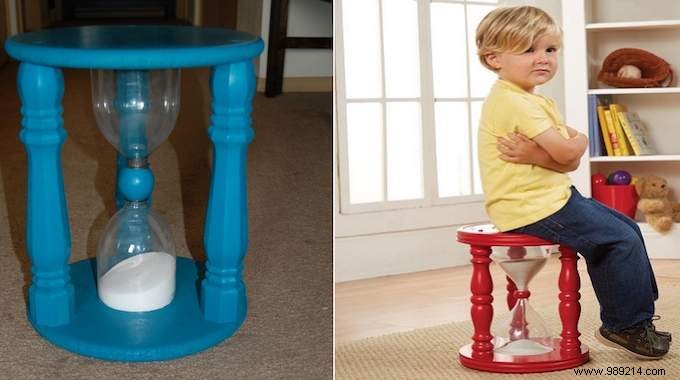
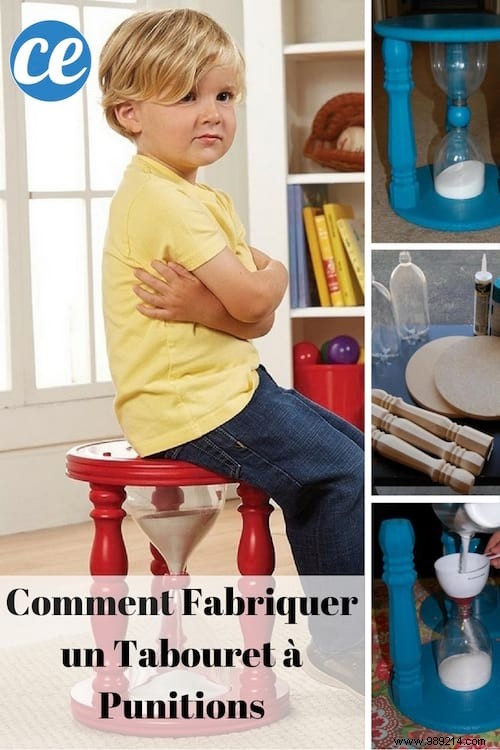
As a parent, you've likely dealt with the frustration of vague timeouts where kids question how long to stay put. The solution? A clever DIY stool featuring an integrated hourglass that clearly marks the time.

This parent-tested design ensures your child waits patiently until the punishment ends—no more arguments. Drawing from my own experience crafting family solutions, here's an easy, budget-friendly tutorial.

Discover how to build this hourglass time-out stool yourself. It's straightforward and effective:

DIY Time-Out Stool with Built-In Hourglass: Simple Step-by-Step Guide for Parents

Contents
  • What you need
  • How to
  • Result

What you need

DIY Time-Out Stool with Built-In Hourglass: Simple Step-by-Step Guide for Parents

  • 2 x 2L soda bottles
  • 2 wooden circles, 30 cm diameter
  • 3 wooden legs, 35 cm each
  • 1 wooden ball, 5 cm diameter
  • Spray paint in your chosen color
  • 1 metal washer sized to fit bottle necks
  • Silicone sealant
  • Wood putty
  • Sand
  • Varnish (optional)
  • Drill
  • Wood saw or cutter

How to

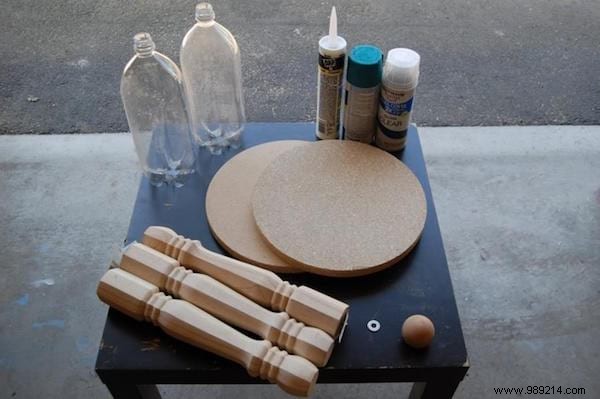
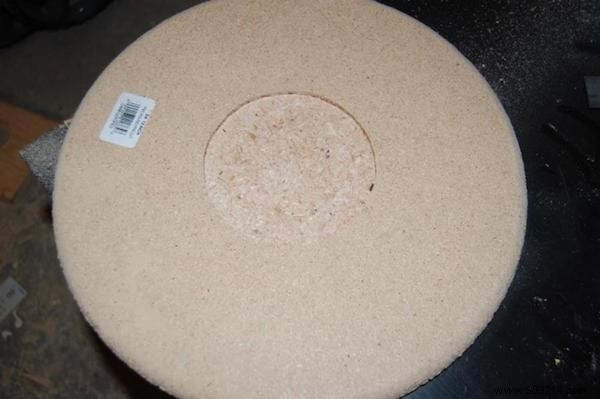
1. Sand the wooden circles smooth to prevent splinters and ensure child safety.

DIY Time-Out Stool with Built-In Hourglass: Simple Step-by-Step Guide for Parents

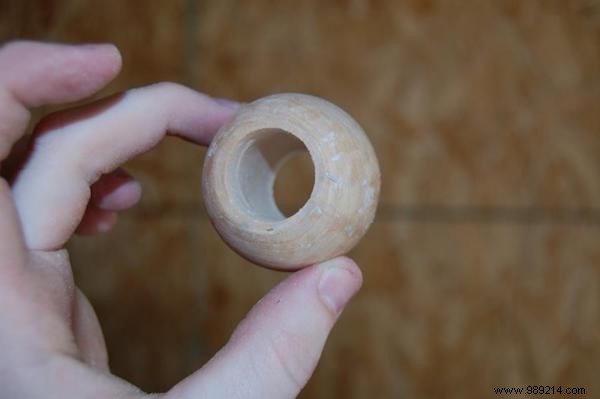
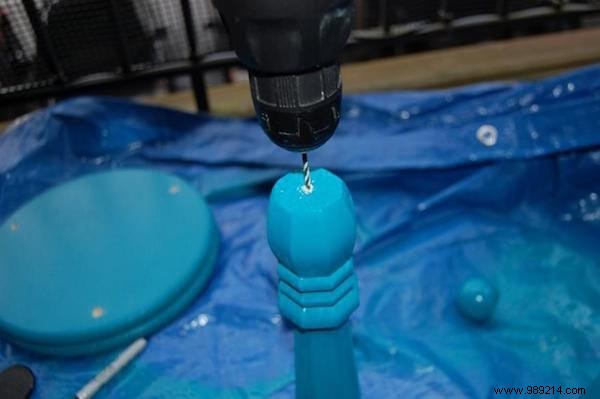
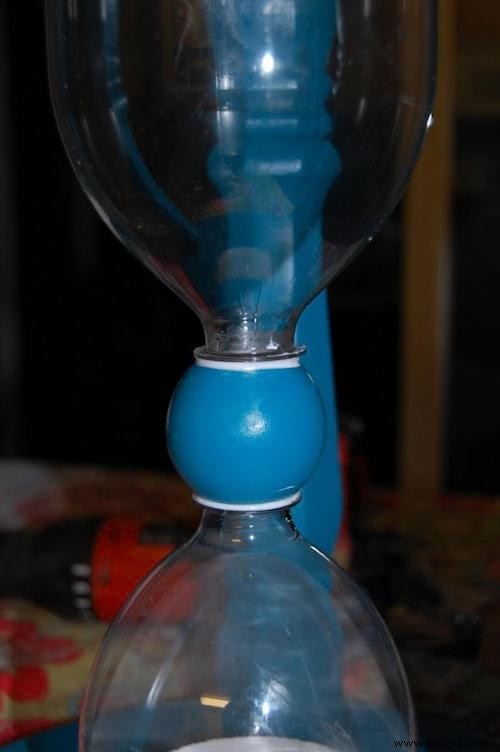
2. Drill a hole in the center of the wooden ball to fit the bottle necks snugly.

DIY Time-Out Stool with Built-In Hourglass: Simple Step-by-Step Guide for Parents

3. It should look like this:

DIY Time-Out Stool with Built-In Hourglass: Simple Step-by-Step Guide for Parents

4. Trace a circle on the wooden circles matching the bottle width.

DIY Time-Out Stool with Built-In Hourglass: Simple Step-by-Step Guide for Parents

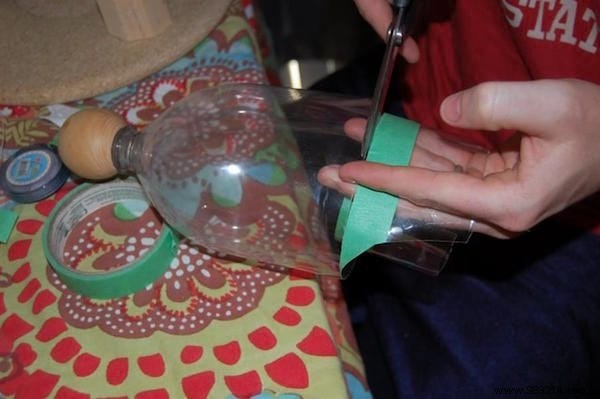
5. Cut the bottles in half, keeping the top sections.

DIY Time-Out Stool with Built-In Hourglass: Simple Step-by-Step Guide for Parents

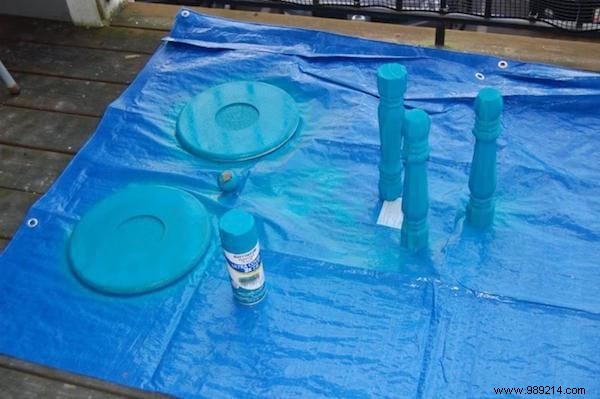
6. Paint the wooden parts in your desired color.

DIY Time-Out Stool with Built-In Hourglass: Simple Step-by-Step Guide for Parents

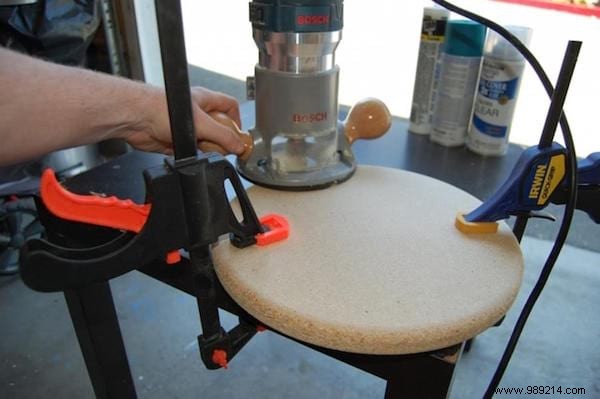
7. Cut a 20 cm equilateral triangle from paper to guide leg hole placement.

DIY Time-Out Stool with Built-In Hourglass: Simple Step-by-Step Guide for Parents

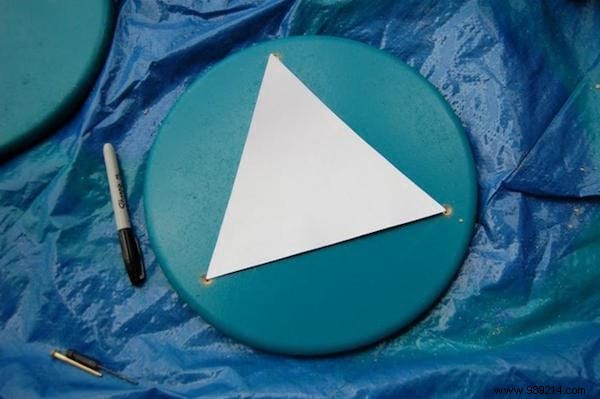
8. Position the triangle in the center of a wooden circle and mark holes at each corner.

DIY Time-Out Stool with Built-In Hourglass: Simple Step-by-Step Guide for Parents

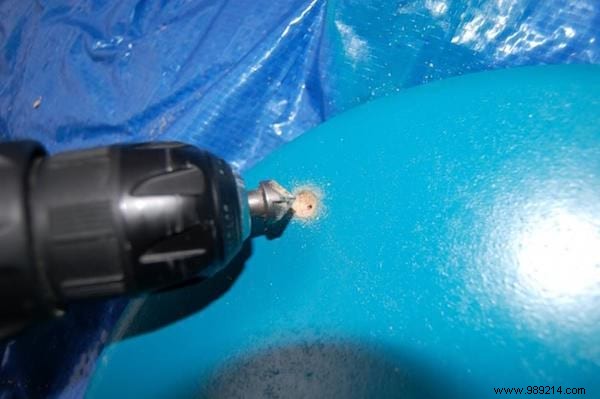
9. Drill the three holes in both wooden circles.

DIY Time-Out Stool with Built-In Hourglass: Simple Step-by-Step Guide for Parents

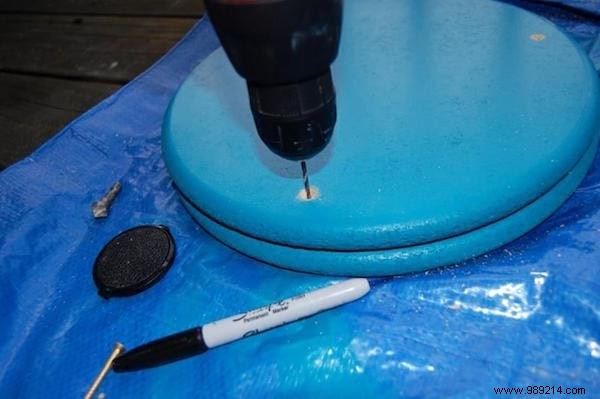
10. Drill matching holes in the legs.

DIY Time-Out Stool with Built-In Hourglass: Simple Step-by-Step Guide for Parents

11. Glue the bottle tops to the circles (hole side down) with silicone and let dry.

DIY Time-Out Stool with Built-In Hourglass: Simple Step-by-Step Guide for Parents

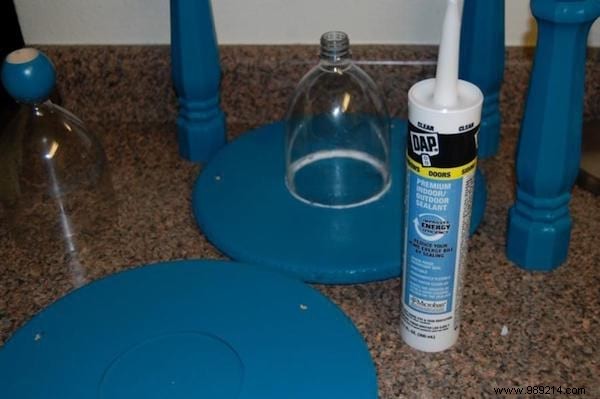
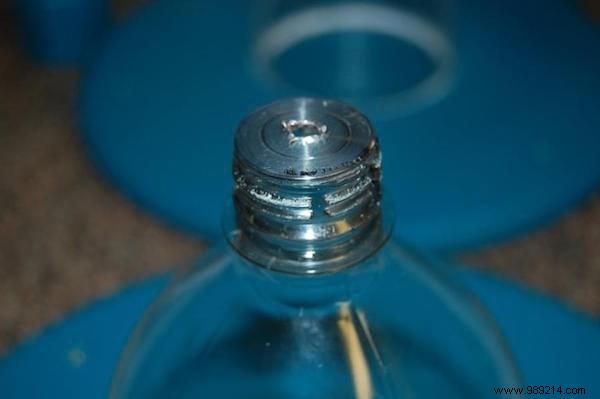
12. Attach the metal washer to one neck and drill a hole for sand flow—the larger the hole, the shorter the timer.

DIY Time-Out Stool with Built-In Hourglass: Simple Step-by-Step Guide for Parents

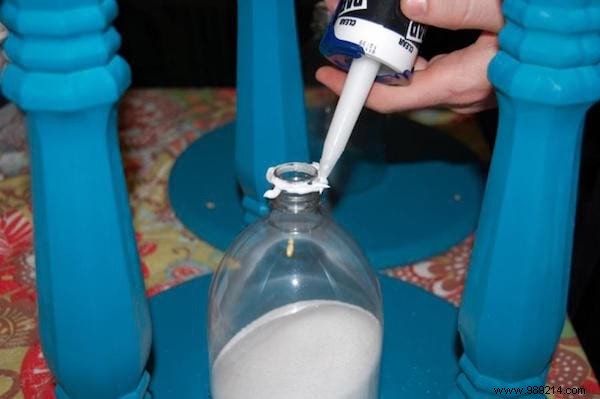
13. Screw the legs into one wooden circle. Funnel sand into the upper bottle.

DIY Time-Out Stool with Built-In Hourglass: Simple Step-by-Step Guide for Parents

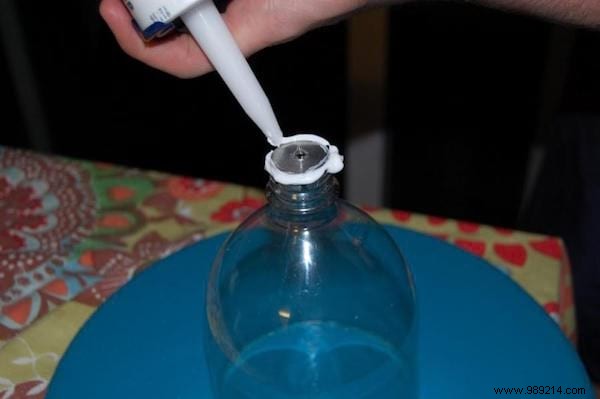
14. Apply silicone to both necks.

DIY Time-Out Stool with Built-In Hourglass: Simple Step-by-Step Guide for Parents

DIY Time-Out Stool with Built-In Hourglass: Simple Step-by-Step Guide for Parents

15. Connect the halves using the drilled wooden ball, then screw legs to the top circle.

DIY Time-Out Stool with Built-In Hourglass: Simple Step-by-Step Guide for Parents

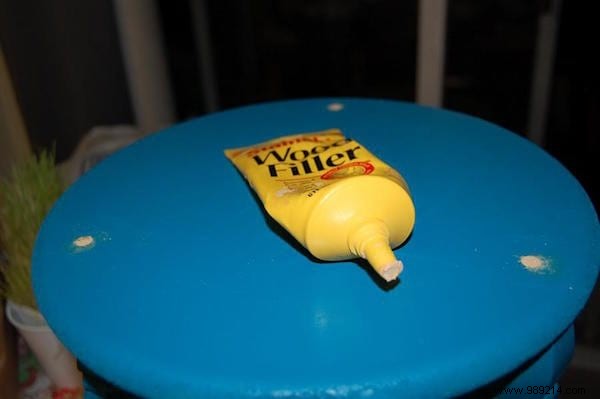
16. Fill screw holes with wood putty, smooth, dry, and repaint.

DIY Time-Out Stool with Built-In Hourglass: Simple Step-by-Step Guide for Parents

Result

DIY Time-Out Stool with Built-In Hourglass: Simple Step-by-Step Guide for Parents

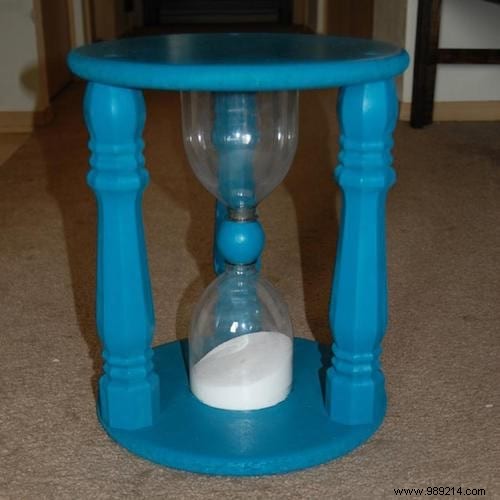
And there you have it—your time-out stool is complete! Quick, affordable, and highly effective.

I've built and used this with my own children, and it transforms discipline: they sit calmly, gaining independence as the sand runs out.